
This Polaroid has been brought to you by the year 1974.

This Polaroid has been brought to you by the year 1974.
It’s another take on this month’s #baketogether. The recipe of the month is vanilla pot de creme and the goal is to take it and make it your own. I’ve already posted one version, using a straight forward baked custard.
This time I skipped the part where it is supposed to be baked in the oven and chilled it in the fridge instead. Then I hauled out the ice cream maker and made frozen vanilla custard.
Then I took the strawberry sauce and heated it up on the stove. If you ever find yourself in Germany, in an ice cream shop, you may notice one of the toppings they sell is hot raspberry sauce. It is delicious. I took the idea of heating up the strawberries from that.
Finally, to make it look fancier, and because my kids asked for it, I topped the whole thing with a dollop of freshly whipped cream. We loved this so much we all had seconds. Some of us may have even licked our bowls. I’m not saying who, though.

And the best part about this all is that, for the first time in #baketogether history, I did not change any of the ingredients from the original recipe (which you can find on Abby’s blog here). I only changed the procedures. I think maybe I should get a special prize for that: Most Transformed Dessert Made Without Really Changing Anything, or something like that.
It’s time for the February #Baketogether. This month its vanilla pot de creme, which happens to be one of my favorite desserts. I think I will have to post multiple entries for this one.
My first, just in time for Valentine’s Day, is vanilla bean pot de creme with fig and walnut wine preserves, and a caramelized almond heart. You will find the recipe for the pot de creme on Abby’s website. I followed it pretty much as given, except that I used half heavy cream and half whole milk in place of the half and half.
Once baked and chilled, I topped it with a spoon of fig and walnut wine preserves from Vista d’Oro, which you should immediately purchase because nobody’s life is complete without them. I topped the preserves with heart shaped caramelized almonds.
To caramelize almonds, place slivered almonds and sugar in a heavy-bottomed pot. Heat them, stirring constantly, until the sugar melts, and turns golden brown. Quickly drop spoonfuls of the caramelized almond onto parchment or foil, and spread them into heart shapes. How many almonds? As many as you want. How much sugar? enough to coat the almonds.
Abby recently posted her recipe for Chicken Paprikash Pot Pie. It looked delicious, and I had recently been craving chicken paprikash, so I had to make it. Of course I also had to switch it up a bit, in this case, by adding 1 tsp. of berbere seasoning, a spice blend commonly used in Ethiopian cooking.

This one simple change completely transformed the dish. I loved it so much I could not stop eating it. I think I had it for supper five nights straight. And I’ve been thinking of making it again ever since.
I did make a few other small changed to Abby’s recipe, but nothing substantial. I used leftover roast chicken, because I had some on hand, and a red pepper instead of green for the same reason. For the pie crust I used my own standard recipe (1 1/2 cup flour, 3 oz leaf lard, 2 ox butter, 6 T. water and a pinch of salt). These were small tweaks, though. The real difference was the addition of the berbere.
P.S. While I make a lot of my spice blends myself, berbere is one I order, because I love the way this company makes it. I get it from Monsoon Coast. And no, they are not paying me to promote them.

I’m back from my blog holiday, and I’m ready to rumble. In one corner we have challah, soft, eggy, golden, and faintly sweet.
 In the other we have brioche, decadent and rich with butter. Which will emerge victorious? Which will claim the french toast crown?
Over Christmas a friend asked me where in town she could get brioche. She had heard that it made the best french toast. This lead to a discussion of how to make the best french toast. I grew up eating it made from challah, and I suppose you see where this is going.
Which was better? I had to know. I made challah. I made brioche. I invited a few friends over to assist with the taste testing. In the end, we decided that there is no such thing as bad french toast and we would happily consume either. When forced to choose, the challah came out slightly ahead, but it was a far from unanimous decision.
Make them both and try it for yourself. You can find the challah recipe on Jasper’s blog here. My favourite brioche, from Baking with Julia, is posted below, with my modifications. Note that unlike challah, which can be made in an evening, brioche takes some time, so plan to start a day ahead.
Basic Brioche (adapted from Baking with Julia)
Make the sponge:
Make the dough:
(Jasper is 7. He loves to bake. He wanted to write a guest blog post. Here it is)
I made chocolate crinkle cookies today.
Once I make the batter I roll them up into a ball and then put them in powdered sugar then I put them on the baking sheet.
When they were finished getting cooked I tasted them and I think I made them very well.
They taste chocolatey. Their texture is soft. When I eat them they make me feel very happy. I like them very much. And you should make them too.
I got this recipe in a book called Kids Baking. It was a Christmas present. It was written by Abby Dodge, my Mom’s friend.
Chocolate Crinkle Cookies

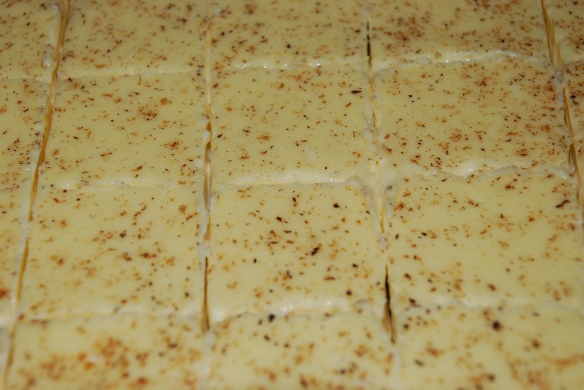 These were a spur of the moment cookie, because I love the flavor of eggnog, and I was craving eggnog, but I don’t like drinking it.
Eggnog Cheesecake Bars
 I made these bars for the first time last year, and immediately fell in love with them. The original recipe is from a Better Homes and Garden’s cookie publication, but I have adapted it fairly liberally.
I made them this year as a straight up chocolate cookie, but the flavoring options are endless. After you make the filling, you stir 3 tablespoons of liqueur into it. If you want to stick with chocolate, use creme de cacao. If you feel like mixing things up a bit try creme de menthe, or Kahlua, or Bailey’s, or even framboise. The choice is yours.
These cookies also go exceptionally well with whipped cream, should you find yourself in search of any serving suggestions.
French Silk Bars
These cookies are cute, they are delicious, and they are a perfect recipe to make with kids. The addition of graham cracker crumbs to the batter takes the flavor to the next level, a toasty, crunchy yet chewy level. The dough is simple to make, and there is no rolling or cookie cutter required. The bears are made with balls and logs of dough that you shape with your hands.
Here they are ready to go in the oven.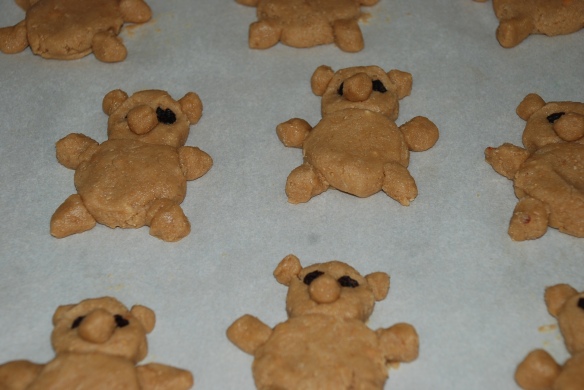
And here they are out of the oven.
Peanut Butter Graham Bears
